

I love food—who doesn’t? And I love to spend as much time in the kitchen as I can, which is probably why my kitchen is the size it is. Lots of counter tops, built- in butcher blocks wherever possible, and professional quality knives and cookware make food preparation a lot easier. However, almost any size kitchen and any array of normal appliances can be used in the preparation of some of my favorite recipes. And no, don’t call me a gourmet. I’m just a dilettante with discriminating taste buds. On the other hand, when I’m deep into a book, I’m liable to throw time consuming recipes to the wind and whip up something quick and easy which can be reheated over several days.
Anyway, here are a few of my favorite mouth-watering dishes:
What the Reviewers Said
—Christiane Heggan,
New York Times bestselling author of Where the Truth Lies
-Nancy K. Austin,
co-author of The Assertive Woman
What the Reviewers Said
—Romance Reviews Today (romrevtoday.com)
Click here to read the entire review
—Romantic Times
(romantictimes.com)
Rating: Four Stars
(Compelling—Page Turner)
—Just Erotic Romance Reviews
Rating: Four Stars
—Cosmopolitan (Book Club Page)
—Booklist
—Kirkus Reviews
—Publishers Weekly
—USA Weekend
—Romantic Times (Four Stars)
—Romance Reviews Today (romrevtoday.com)
Click here to read the entire review

—Booklist
—Publishers Weekly
—Midwest Book Review
—Romantic Times
—Roundtable Reviews
—A Romance Review
—Publishers Weekly
—Midwest Book Review
—Booklist
—Bookviews
—Bookreporter.com
—The Sanford Herald
—Kirkus Reviews
—Bookviews
—Romantic Times
—Publishers Weekly
—Kirkus Reviews
—Romantic Times
—Booklist
—Affaire de Coeur
—romrevtoday.com
—People Magazine
(A People Beach Book of the Week)
—Booklist
—Book Page
—Library Journal
—Publisher’s Weekly
—Curtain Daily Gazette
—Midwest Book Review

—Publishers Weekly
—Booklist
—Book Page
—Publishers Weekly
—Booklist
—Rhapsody
—Library Journal
—Publishers Weekly
—New York Daily News
—Kirkus Reviews
—Kirkus Reviews
—Library Journal
—Rendezvous
—Rex Reed
—Chicago Tribune
—Atlanta Journal Constitution
—Sue Pollock, producer of The Two Mrs. Grenvilles
—Atlanta Journal and Constitution
—The Houston Post
—Kirkus Reviews
—The Charlotte Observer
—New York Daily News
—The Advocate on ‘Cool Summer Books’
—Bolton Evening News (U.K.)
—Publishers Weekly
—Review, 1989
—- Liz Smith
—HYPE Magazine (U.K.)
—Publishers Weekly
—The Globe
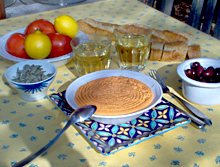
Red Pepper and Feta Spread
This Greek recipe is very similar to one found in parts of Turkey, although the Greek version uses feta cheese rather than curd cheese. It’s as simple as pie, and takes no time at all - so long as you remember to cut the red peppers in half, get rid of the seeds, and place them skin-side up in a broiler. When the skins of the peppers turn black (there’s no need to turn them) , take them out of the oven and peel them immediately while hot. That’s the secret to peeling red peppers in a jiffy.
I suggest using “Pure” as opposed to “Extra Virgin” olive oil to give the dip more of a “peasant” flavor. Serve chilled (I prefer to chill the mixture overnight in the refrigerator so that it isn’t as liquidy as it first appears). The perfect accompaniments are a very crusty loaf of bread, or slices of French baguettes. You can toast the bread if you like before serving, or simply cut off fresh slices, the way I do. I suggest serving it with a small bowl of Kalamata olives on the side. Oh, and forget vintages - any decent white table wine rounds off this appetizer to perfection.
1/2 teaspoon dried red pepper flakes
1 clove minced garlic
2 grilled and skinned large red peppers
1-2/3 cups crumbled feta cheese
Heat the olive oil in a skillet until hot, stir in the red pepper flakes, and after a minute or so, add the minced garlic (the garlic should be a pale gold; not brown). Remove skillet from heat and let cool.
Purée the red pepper, feta and olive oil mixture in a food processor or blender. Pour into a small bowl, cover, and refrigerate. (Don’t be afraid if it seems too liquid; it needs to be chilled in order to set.)
There’s nothing to it!
Serves 6 to 8.
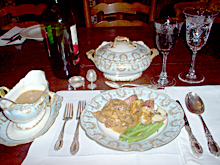
Pot Roast with Mushroom Sauce
Here’s a classic which Rhea always teases me is a recipe that belongs in “The Old Betty Crocker Cookbook.” Hey - all joking aside, it’s still one of the easiest meals to prepare, and always tastes best when it’s reheated the next day. It’s the perfect entrée for company - since it just needs reheating and gives you time to spend with your guests instead of slaving in the kitchen!
Serve with rice, parsley potatoes, or atop egg noodles (I personally tend to favor the latter), and generally pair it with fresh green beans or asparagus. Any good hearty red wine makes an exceptional “marriage” with this dish.
Note: I cheat and used canned, drained mushroom slices. The secret’s in the Vermouth! Also, I usually cook two big pot roasts (3 to four pounds each) at a time. This keeps me out of the kitchen for a few days.
You will need a very large heavy pot with a lid.
6 cups of chopped onions (the regular yellow-skinned kind)
4 cloves minced garlic
2 or 3 stalks celery, finely chopped
2 or 3 large, thinly sliced carrots
1 or 2 large beef pot roasts (depending upon how many meals you want for leftovers)
2 cups water
2 cups beef stock (canned is fine; in a pinch I’ve even resorted to using bouillon cubes)
2 crumbled bay leaves
2 teaspoons salt
1/2 teaspoon pepper
2 cups dry white vermouth
2 8-ounce cans mushroom slices
Cornstarch (as needed)
Cold Milk (as needed)
3-4 tablespoons butter
Salt and pepper to correct seasonings
Sauté the chopped onion over medium heat and stir until the onions turn translucent. Stir in the garlic for a minute or two (but not until it’s brown). Using a slotted spoon, transfer the onion and garlic to a separate dish.
Turn up heat to high (and use your exhaust fan!) and brown the pot roast evenly on all sides in the remaining oil. Turn down the heat back to medium. Stir in the chopped celery and carrots, but don’t let them get brown. Add the garlic and onion mixture, water, beef stock, bay leaves, and the salt and pepper. Bring to a boil, cover, turn down the heat to very low and simmer for an hour or two. Add the vermouth and mushrooms. Cook slowly for another hour or two. You want the meat to virtually fall apart.
When the meat is cooked, transfer it to a warm platter and place in a warm oven.
You should have plenty of liquid at this point. Over high heat, and stirring occasionally, let it boil down until it’s halved, all the while skimming the fat off the top with a large spoon. (I never use one of those glass de-greasing utensils with a spout; they’ve never worked for me. The old-fashioned way is still best.)
When most of the fat is skimmed off, place 2 tablespoons of the cornstarch into a cup and add the cold milk (it has to be cold, or else the cornstarch will be lumpy). Stir it well and add it to the sauce mixture, stirring constantly to make certain there are no cornstarch lumps. (Depending upon the amount of liquid, you might have to repeat this step several times.)
After you have a sauce consistency of your liking, stir in the butter to glaze the mixture and add flavor the sauce. You will want to taste it and correct the seasoning with salt and pepper.
And there you have it! Take the meat out of the oven and pour the sauce over it. Serve plenty of sauce in a gravy dish on the side.
Serves 4-16, depending upon how much beef you’ve used. And the leftovers are just as delicious when they’re heated up.
Chicken Breasts Supreme
Here is another never-fail recipe I like to serve guests. The beauty of it is, it tastes a lot more complicated and time-consuming than it actually is! (But you needn’t give that secret away!)
It goes great with rice or egg noodles, and for side dishes I recommend pea, green beans, asparagus, or spinach. A “good” bottle of chilled white wine, such as a Burgundy or Bordeaux add just the right fillip.
NOTE: This dish can be prepared in advance and reheated, but the sauce isn’t quite as delicious as it is when it’s served immediately.
4 boneless, skinless chicken breasts, with any excess fat removed.
1 teaspoon of freshly squeezed lemon juice
1 teaspoon salt
Pepper to taste
4 tablespoons butter cut into small pieces
1/2 cup beef stock (I cheat and use canned)
1/2 cup of dry white vermouth
2 cups heavy cream
A few drops of lemon juice
A bit more salt and pepper (according to taste)
4 tablespoons of minced fresh parsley (the flat Italian kind)
4 slices of freshly cut lemon (optional)
NOTE: The chicken cutlets don’t need to be pounded thin. However, if they are very thick (my choice), you might want to flatten them a bit with the solid (NOT the crisscrossed, scored side of a meat mallet) or else the flat side of a very heavy knife. Also, you will need a very large oven-proof skillet or casserole with a lid, and a piece of wax paper cut to size (you can use the skillet or casserole dish as a template) to cover the chicken once it’s cooking.
Ready? Set? Here goes:
Preheat oven to 400 degrees. Butter one side of the wax paper with the 1/2 tablespoon butter.
Rub the cutlets with the lemon juice on both sides. Salt and pepper lightly. Place the cut-up pieces ( 4 tablespoons) of butter into a very large oven-proof skillet or casserole and place it in the oven. When the butter is foaming, add the cutlets and then turn them almost immediately. Place the buttered wax paper (butter side down) atop them and cover with the lid.
I usually let them cook for about 15 to 20 minutes because I like my chicken well done - with no pink in the middle. Gourmets might have truck with that, but that’s the way I prefer it. If you like your chicken slightly pink on the inside, just cook it for a shorter period of time.
When the chicken is done, remove it to a heated platter (reserving the chicken juices in the skillet or casserole) and prepare the sauce on the stove top over high heat. Pour in the beef stock and vermouth and boil down until the liquid thickens somewhat. Then stir in the heavy cream and continue to boil down until the sauce has thickened.
Adjust the seasoning with more salt and pepper to taste if necessary. Then spoon the sauce over the cutlets and sprinkle with parsley. (I usually add a slice of lemon to each plate should anyone want to squeeze extra lemon juice atop the cutlets.)
And voilà! C’est fini! It sounds a lot more complicated than it is - and tastes...well...supreme! Trust me, it inevitably impresses guests. And after you’ve prepared it once, it’ a snap.
Serves 4.
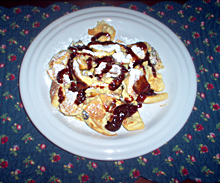
Viennese “Kaiser Schmarrn”
The German name literally translates as “Emperor’s Omlette.” Dating back to the Austro-Hungarian Empire, there are two ways to prepare this sweet, dessert-like dish of raggedly torn crêpes drizzled with red raspberry syrup and dusted with snowy white sifted confectioner’s sugar.
The more difficult, hoity-toity way is in the oven. Scratch that.
The following method is the way Nick’s grandmother in Austria (where he was born) used to make it, and as a real treat, it was served as a light main course or a light supper. And while the gourmet version uses golden raisins or sultanas, Nick’s grandmother always used regular raisins.
NOTE: You might want to use several skillets at once, so that you can cut down on the number of batches you need to cook. Otherwise simply keep each batch warm in a preheated oven (300 degrees, then turn off the oven but keep the door slightly ajar so that the pancakes do not continue cooking..
An excellent accompaniment to “Kaiser Schmarrn” is a sweet white dessert wine.
9 large, room temperature eggs
3/4 teaspoon cream of tartar
2 cups all-purpose sifted flour
1-1/2 teaspoon baking powder
1/2 teaspoon vanilla extract (go for the real thing; never the imitation)
1/2 teaspoon salt
1/2 cup cold milk
1 tablespoon vegetable oil (approximate)
1/2 cup raspberry syrup (or you can just heat up raspberry jam to liquify it, although it’s not quite as good)
1/3 cup confectioner’s sugar
Preheat over to 300 degrees. Once it reaches that temperature, turn it off.
Plump the raisins by pouring enough boiling water over them to cover. Let me soak for a few minutes. When they have swelled, remove from water, drain, and dry on paper towels.
Separate 6 of the egg whites from the yolks, putting the whites into one large bowl, and the yolks into another large bowl.
Crack the 3 remaining eggs, whites included, into the bowl with the yolks.
Add the cream of tartar to the bowl containing the egg whites (this will stabilize them when they have been beaten).
With an electric beater (mixer), whip the egg whites until they form stiff peaks. Set the beater aside (you needn’t wash it if you do this in sequence).
Sift the flour, backing powder, and salt into the bowl containing the egg yolks. Stir to mix, then add the plumped raisins, flour, milk, and vanilla. Beat until mixed.
On low speed, gently fold the whipped egg whites into the batter.
Dip a crumbled-up paper towel into the oil and thoroughly but lightly grease two skillets. Turn on heat to medium. When the skillets are hot, ladle some of the batter into them, (using enough to make one large pancake in each.
NOTE: The raisins will have sunk to the bottom of the batter, so ladle the batter up from the bottom of the bowl. (Don’t worry if the pancakes don’t turn out perfect; you’ll have to tear them into large chunks anyway.)
Cook the pancakes on each side until they are done and golden, but not brown. Place in the oven to keep warm until you are finished.
Tear the pancakes into ragged, somewhat larger than bite-size pieces, place equal portions on individual plates, and drizzle with the raspberry syrup. Then, using a sieve or sugar shaker, liberally dust each plate with confectioner’s sugar.
Serve warm and indulge!
Makes 4 servings.
Classic Coquilles St. Jacques
This French classic is exceedingly simple to prepare and makes for a wonderful first course. On the other hand, at times I’ve doubled the ingredients and served it as a marvelous main dish, along with rice and a green vegetable.
Be sure and use the small, pearl-like bay scallops rather than the larger sea scallops.
(Note: Except for reheating, this dish can be prepared completely ahead of time. Also, the proportions of the ingredients below is as an appetizer for 4 persons, not as a main course.)
1/2 teaspoon salt
1/4 teaspoon pepper
3/4 cup sifted flour
1 tablespoon butter or margarine
1/4 cup finely chopped onion
2 tablespoons minced shallots
1 medium-size garlic clove, minced
1 tablespoon plus 2 additional teaspoons butter
1 tablespoon plus 2 additional teaspoons olive oil
3/4 cup dry white wine
1 bay leaf
1/4 teaspoon dried thyme
3 additional tablespoons butter
1/3 cup grated Swiss cheese
Rinse the scallops in cold water and dry well on paper towels. Sprinkle with salt and pepper and then roll them in the flour. Place them in a large sieve and shake off any excess flour.
Melt the tablespoon butter in a skillet and add the onions. Cook slowly. Once they are soft and translucent (about 5 minutes), stir in the shallots and garlic. Cook for another minute (being careful not to burn the garlic) and remove the skillet from heat.
In another skillet, heat 1 tablespoon plus 2 teaspoons of butter plus the olive oil. Turn heat on high and add the scallops. Shaking the skillet from time to time, cook the scallops for several minutes until they are light brown. Turn heat down to low.
Add the contents of the onion skillet, the wine, bay leaf, and thyme to the skillet containing the scallops. Bring to a boil, cover, and let cook for 5 minutes. When done, remove the bay leaf.
Butter 4 individual baking scallops or oven-proof gratiné dishes and divide the scallop mixture equally between them. Top with the grated Swiss cheese and dot them with the remaining butter.
(Note: This recipe can be prepared completely ahead of time up to this point. Simply cover the dishes and refrigerate until you are ready to bake. When you are, leave them out at room temperature for a while.)
5 minutes before serving, place the uncovered dishes in a 375 degree oven until the scallop mixture bubbles and the cheese is entirely melted. Serve immediately.
And there you are—a gourmet chef!
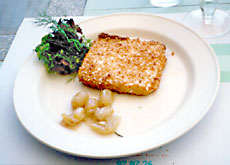
3 Super Easy “Grilled” Feta Appetizers from Mykonos
As you’ve probably guessed from the name, I discovered these three totally different variations of making Feta Cheese appetizers while in Greece. They are so easy to make, and take so little time a child of 8 could probably do them as well as any adult. All you need is an oven with a broiler and presto—you’re cooking. (Note that I’m using the word “grilled” loosely, since I usually cook these under the broiler.)
All three recipes require a raised edge metal baking tin, a piece of aluminum foil, and an 8 oz. “brick” of traditional Feta cheese, preferably Athenos brand. I personally like the sealed Feta in a bit of water or brine to “dry” feta.
Serve with a bowl of Kalamata olives and cucumber slices.
Here are the variations:
Paranga Beach Grilled Feta “Starter”
1 8-oz. “brick” moist Feta cheese
Just before use, dry roast the sesame seeds in a heavy ungreased pan over medium heat. Shake the pan occasionally until the seeds turn golden brown (about 3-5 minutes). Remove from heat and cool slightly.
On a plate, spread the sesame seeds out evenly and press all 6 sides of the brick of Feta in them, until the cheese is entirely covered with the dry roasted sesame seeds.
Place the cheese on a rectangle of foil and wrap it tightly and neatly, as you would a gift package, but fold the foil several times at the top to make it virtually air tight..
Place in a preheated oven under the broiler for approximately 5-8 minutes, or until the Feta is hot, but so the cheese is not melted; you only want it piping hot.
With a spatula, place the foil packet on a serving dish. Remove foil at the table, taking care (steam can burn skin!).
Cut into 4 equal servings.
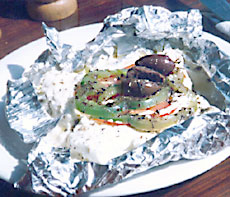
Grilled Feta Kala Livadi
1 tablespoon extra virgin olive oil
1 medium size yellow onion, chopped
1 large green pepper, chopped
1 large ripe tomato, cut into small strips
Heat the oil in a saucepan. Add the onion and cook about 5 minutes (until it is translucent but not brown). Add the green pepper and tomato. Cook, stirring occasionally, until the green peppers are soft.
Wipe a little of the excess olive oil on the underside of the Feta and place it on a square of aluminum foil. Using a slotted spoon, scoop up the vegetable mixture and place about 2 to 3 tablespoons of it atop the Feta.
Fold the foil around it and cook and serve exactly as the “Paranga Beach Starter.” A nice accompaniment is a plain red table wine which, if you serve it in a carafe, no one will know it’s not Greek!
(Note: If you double the above recipe and later add chopped pieces of ham to the leftover vegetables, you’ve got the makings of a Western Omelet, albeit one with olive oil.)
Cut into 4 equal servings.
Grilled Feta with Pesto Sauce
1 & 1/2 teaspoons minced garlic
2 & 1/2 tablespoons pine nuts
Salt (to taste)
1/3 cup extra virgin olive oil (reserving a tiny bit for oiling the aluminum foil)
1 moist 8-oz. brick Feta cheese
(Note: Here you can cheat by using a good brand of store-bought pesto (it comes in a jar; the best is usually available at health food or specialty food markets. If you don’t cheat, start by making the pesto:
Place the first 4 (dry) ingredients in a blender or food processor and mix for a half minute or so. Add the oil and continue blending until you have a thick cream.
Spread a bit of the reserved olive oil on a square of aluminum foil. Place the “brick” of Feta atop it, and spread the top and sides with the pesto sauce. Follow the directions above for closing the foil, using the broiler, and serving at the table.
Cut into 4 equal servings.
(Interestingly enough, if you crumble the Feta (or use soft goat’s cheese) and add black pepper and reheat this “sauce,” you have just the right topping for an Italian dish called Pesto al Caprino. Just serve atop thin spaghetti and do not serve with Parmesan or any other grated cheese.)
Melon and Fig Salad à la Christiane Heggan
This recipe is from my fellow author and gourmet, Christiane Heggan, whose novel, Scent of a Killer was nominated for the Mary Higgins Clark Award, and whose new thriller, Now You Die is coming out in November. Having grown up in France, it’s only natural that she appreciates good food! So, we decided to exchange recipes for our websites.
The following fruit salad, which is quick and easy, is intended as an appetizer—a great idea for those hot, hot days of summer. Or anytime, if you ask me. Herewith:
2 & 1/2 tablespoons lemon juice
1/4 cup fresh basil, finely minced
1 teaspoon sugar
3 cups cubed cantaloupe or honeydew (or better yet, charantais melons)
1 lb ripe figs, sliced into quarters
4 sprigs basil (optional)
In a bowl, stir the cream, lemon juice, basil, and sugar. Cover and refrigerate for anywhere from 1 to 6 hours.
When you’re ready to serve, divide the cantaloupe cubes and the quartered figs between four salad plates. Drizzle with the chilled cream and garnish with the basil.
Now, is that simple, or is that simple?
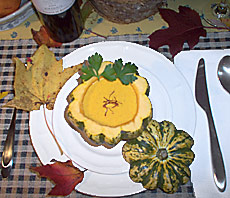
Carrot Soup With Coriander
Here’s one of those perfect starter dishes for when autumn is in the air, or it’s winter and you want to enjoy a wonderful meal at home in front of a toasty fire. This cream soup, with its spicy coriander taste is not only relatively simple to prepare, but economical as well. Best yet, it can be cooked completely ahead of time, and even people who are normally fussy about carrots tend to find it undeniably delicious.
(Note: Ground coriander comes from the seeds of the cilantro plant, but don’t ever confuse the two. The green plant and the seed taste entirely different.)
1/2 cup chopped onions
1 & 1/2 tablespoons minced shallots
1 clove minced garlic
3 cups (about 1 & 1/2 one-pound packages) carrots.
2 cans (13 & 3/4 ounce size) chicken broth
2 & 1/2 tablespoons ground coriander
1/4 teaspoon ground pepper
1/2 teaspoon salt
2/3 cup dairy sour cream
Peel, wash, and slice the carrots into 1/2-inch pieces.
In a medium-size saucepan, melt the butter or margarine and cook the onions for about five minutes over low heat, until they are tender and translucent but not brown.
Stir in the shallots and the garlic and cook slowly for one more minute. Be careful not to burn the garlic.
Add the carrots, chicken broth, coriander, and pepper to the saucepan. Cover and bring to a boil. Then turn down the heat and simmer for 15 to 20 minutes, until the carrots are very tender.
Set the saucepan aside. Once the soup is cool, pour it into a blender or food processor, cover, and puree until smooth.
Pour the puree into a clean saucepan, add the salt and sour cream, and stir well to blend. Taste and adjust seasonings if necessary. Heat the soup over low heat, stirring constantly, but do not let it boil, or else the sour cream will curdle.
Pour into individual serving dishes and garnish with a sprig of parsley.
Then just sit back and accept the compliments.
(Note: If you have prepared this dish to serve later, or the next day, follow the above instructions for heating; but again, remember: do not let it come to a boil.)
Serves 4.
Spicy Mango Soup
As far as I’m concerned, soups are definitely under-rated. Unless they’re the main event, they’re too often relegated as simply meal starters. Or as something warm during cold weather.
For me, this spicy, exotic, and easy to make soup (as well as the Carrot Coriander Soup) head my personal list of favorites. Best of all, they’re both rather unusual, and you won’t be serving the old same-o same-o. Just watch your guests’ (or family’) faces light up when you serve up these unexpected treats.
4 tablespoons butter
1 & 1/2 tablespoons extra virgin olive oil
2 ripe mangoes, peeled and chopped
3 cups chicken broth
1 teaspoon salt
1/2 teaspoon ground black pepper
2 tablespoons ground chili paste or chili sauce (look in the Chinese section of your supermarket)
1/3 cup creamed, canned coconut
In a medium size saucepan, sauté the onions in the butter and oil until they are translucent (but not brown). Add the chopped mangoes and cook for a few minutes, stirring as needed. Add the chicken stock, salt, pepper, and chili paste. Stir and simmer, covered, for 15 minutes. Remove from heat and let cool.
Pour the mixture in a blender or food processor and puree until smooth. (Note: If the mangoes are stringy, sieve the mixture.) Return the mixture to the saucepan and stir in the creamed coconut. Adjust seasoning if necessary.
(Note: This recipe can be made a day in advance; just keep covered in the refrigerator until you are ready to heat it.)
Yield: 4 to 6 servings, depending upon size.
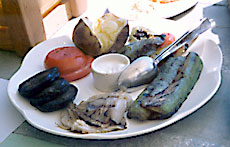
Linguine with Clams and Mussels
Here’s one of the simplest of one-dish recipes; all you need for accompaniment is a very good, crusty loaf of bread for dunking into the sauce. I like to use the Knorr fish bouillon cubes because they save time and labor; I’m generally too busy to spend time cooking my own fish stock.
The only labor-intensive part of this recipe is cleaning the “beards” off the mussels. The clams are a breeze to clean if you follow the instructions. Also, you will need a very, very large pot with a cover.
Actually, you’re let off easy: since I collect all kinds of sea shells for my grotto (no shell is ever left behind), I save all clam, mussel, and cockle shells (and take them home if I eat out), and really have a job cleaning them after they’re cooked!
(Note: Discard any clams or mussels that are open; they should only do this once they’re soaking in water.)
Oh—before I forget, if you decide to make this recipe into an appetizer, or are in the mood for just shellfish without pasta, this recipe is just as good served in large bowls with plenty of the sauce!
2 to 3 dozen fresh mussels
Sea salt (or if you can’t find that, use kosher salt.
2 Knorr brand fish bouillon cubes
2 cups water
1/2 cup vermouth
1 large yellow onion, chopped
3 to 4 minced garlic cloves
1/2 cup extra virgin olive oil, plus an extra tablespoon or two
4 tablespoons chopped parsley (preferably the leafy Italian variety)
Coarse ground pepper (to taste, and preferably freshly ground)
1/4 to 1/2 teaspoon red pepper flakes
1 16-ounce package linguine
Grated Parmesan cheese (preferably freshly grated at the table)
Fill your kitchen sink with a lot of cold water and add a lot of sea salt. (This will cause the clams and mussels to expel any grit.) Let soak for 20 minutes or so. Rinse well and scrub the mussel beards with a stiff-bristled brush. Repeat this step 3 times, always using fresh water and adding lots of the salt. After the final rinsing, you can refrigerate the clams and mussels for several hours.
Combine the fish bouillon cubes, the water, and the vermouth. Bring to a boil and simmer for five minutes. Meanwhile, in a separate saucepan, sauté the chopped onion in the olive oil until it is translucent but not brown (about five minutes), stirring often. Add the garlic and sauté for another minute or so, being careful not to let it brown.
In a very large pot, mix the fish stock and the onion mixture. Add the parsley, pepper, and red pepper flakes. Stir well, cover, and bring to a boil over medium to high heat. Add the clams and mussels once the broth is boiling. Keep the pot covered but stir every so often, moving the clams and mussels around. The clams and mussels are done when they are open (this usually takes 8 to 10 minutes or so. Stir once more and remove from heat.
Serve in the shells over cooked linguine (you will need deep dishes), being generous with both the shellfish and the broth. Sprinkle generously with grated Parmesan cheese and provide plenty of bread for dunking—and try not to smack your lips too loudly!
(Note: If you have leftovers, clean the clam and mussel meat from the shells, add to any leftover broth, and freeze. All you need to do the next time is heat the sauce.)
Yield: 6 to 8 servings, depending upon appetites.
Risotto with Portabella Mushrooms
There is nothing more delicious than a properly made Risotto. Unfortunately, most restaurants either do not have it on their menus, or don’t do it properly. The reason? It’s time and labor intensive—but what’s 20 to 30 minutes? A lot, I suppose, if one person has to be kept stirring the risotto until it is completed. But trust me, this one is fabu...and will earn you raves.
2 tablespoons extra virgin olive oil
3 tablespoons butter or margarine
1/4 cup chopped onion
1/2 cup chopped parsley (preferably the wide-leafed Italian variety)
3/4 cup canned beef broth
4 & 1/4 cups water
Salt (to taste: you can always adjust seasonings after cooking is completed)
Pepper (to taste: you can always adjust seasonings after cooking is completed)
1 & 1/2 cups rice
1/2 cup Parmesan cheese (preferably freshly grated)
Trim away the worst part of the dirty mushroom stems. Then separate the remainder of the stems from the caps and soak the caps and stems in a large pot of cold water for 10 minutes. Under cold running tap water, scrub the stems and tops of the caps with a stiff brush (I find the best brushes aren’t the ones sold in gourmet stores, but the cheap kind sold as fingernail brushes at the local drugstore). Chop the clean stems and caps into 1/2-inch pieces.
Put the olive oil and one tablespoon of the butter (reserving the rest for later) into a large, heavy bottomed pot and place over medium heat. Add the onions, stirring every now and then. They should become translucent but not brown. Then add the parsley and the chopped Portabella mushrooms. Cook, stirring occasionally, until all the liquid from the mushrooms has evaporated.
In a separate saucepan mix the beef broth, water and salt and pepper. Bring to a boil, then let simmer.
Add the rice to the pot with the mushrooms and stir until the rice is well coated. Then add one ladleful of the simmering broth to the mushrooms and rice, constantly scraping the bottom and sides of the pot. When that ladleful of broth has been absorbed, add another ladleful and keep stirring constantly until the rice and mushrooms have absorbed it. Repeat this procedure, never ceasing your stirring, until the rice is done (about 20 minutes). It should be firm but tender. (Note: If you should need to add additional liquid and have used up all the broth, then add warm water.)
When the risotto is done, add the remaining 2 tablespoons of butter and the Parmesan cheese. Stir to mix thoroughly, adjust seasonings if necessary, and serve at once.
Yield: 4 servings
Molded Salmon Soufflé
This is one of those impressive, flawless entreés many people wouldn’t dream of making at home because...well, because it just looks and tastes complicated. Nothing could be further from the truth. And to be really fancy, all you need is a 5 to 5 &1/2 cup semi-circular fish mold, although you can bake it in any mold or appropriate oven-proof dish you may have. Wild rice, asparagus and green beans are the perfect complimentary side dish. Add béarnaise sauce (recipe follows) , and—ta da!—you have the equivalent of love and marriage. Don’t worry about leftovers, either—this dish is as good served as a chilled paté and spread on toast as it is served hot, straight out of the oven.
(Note: If you are pressed for time, you may wish to substitute 1 & 1/2 pounds drained, canned salmon (1 & 1/2 16-ounce cans. You don’t need to pick it over for bones, since the blender or food processor will take care of them, and you can avoid the first two ingredients. However, fresh salmon is always best. But whichever salmon you choose, remember: the beauty of this recipe is that, except for the baking and heating of the sauce, it can be prepared completely ahead of time.)
And here’s an anecdote which just goes to show how careful you have to be when you cook for real “foodies.” A few years ago, I had a small sit-down dinner, and among the guests was my old friend, Maxime de la Falaise, who used to be a fashion model and then a food editor for Vogue magazine. Her column was called “Who’s in the Kitchen with Maxime,” and there was a different celebrity’s recipe each time. She’s also the author of several cookbooks, Seven Centuries of Cooking and Cooking in Vogue. Anyway, knowing her reputation a fabulous cook and gourmet, who’d also taught cooking classes, I pulled out all the stops and made my Molded Salmon Soufflé. (I used fresh salmon, but hadn’t had time to marinate it.) At any rate, I thought it was fabulous and got raves all throughout the dinner. But afterwards, with that British marbles in-your-mouth Upper Crust accent Maxime proclaimed, “Always marinate the salmon first.” So there you have it. All along I’d thought I was showing off! Well, talk about my shoulders slumping! It just goes to show you can’t fool a “real spoon.”
The lesson of that anecdote? Use fresh ingredients whenever possible—and if you’re cooking for real gourmets, never use a shortcut.
The Salmon
3 tablespoons lemon juice (preferably fresh squeezed)
1 & 1/2 lbs. fresh salmon (I recommend fillets rather than steaks, as you won’t have to deal with bones)
A pat of butter, margarine, or bit of oil or cooking spray (for greasing the baking dish)
2 & 1/2 tablespoons butter (or 3 tablespoons margarine)
2 tablespoons flour
1 & 1/2 cups milk
3 eggs
3 egg yolks
1 teaspoon salt
1/2 teaspoon pepper
1/2 cup heavy cream
3 tablespoons vermouth
2 to 3 tablespoons butter or margarine (for greasing the mold)
1 cup béarnaise sauce (immediately follows the salmon recipe)
In a baking dish, mix the 2 tablespoons of olive oil and 2 tablespoons of the lemon juice (reserving one tablespoon of lemon juice for later) along with 1/2 teaspoon of the salt and 1/4 teaspoon of the pepper (reserving the rest of the salt and pepper for later). Lay the salmon face down in the dish, spoon any excess mixture over the top of it, and cover completely with wax paper to marinate for at least 8 hours or overnight. Leave out at room temperature and turn the salmon every few hours. (Avoid this step if you’re using canned salmon.)
When you are ready to bake the salmon, throw out the marinade mixture and wipe the excess off the fish with a paper towel. Lightly butter a Pyrex baking dish and place the fish in it, skin side down, and bake at 350 degrees until the fish is done (and flakes with a fork). Do not overcook. Let the fish cool, then scrape the pink the pink meat off it and crumble it into small pieces. Discard the skin.
In a saucepan, heat the milk until it boils.
In another saucepan over medium heat, melt the butter or margarine. Add the 2 tablespoons flour and stir swiftly. If you are using real butter, cook for several minutes while stirring, but don’t let it get brown; if you are using margarine, don’t let it cook any further. With a wire whisk, beat the boiling milk into the butter, a little at a time. The resulting bechamel sauce should be thick and smooth, but don’t worry if there are small lumps. (The blender will take care of them.) Let the sauce cool.
In a blender or food processor (you’ll need to do this in two batches), add the fish, lemon juice, eggs, egg yolks, sand, and pepper. Blend at high speed for a minute until the mixture is smooth and pink.
Add the cooled white sauce, heavy cream, and vermouth. Blend for another 20 seconds. Strain the sauce through a fine sieve into a large bowl.
(Note: If you are making this ahead of time, cover the bowl and refrigerate for a day or until ready to cook. The béarnaise sauce can also be made ahead of time.)
About 45 minutes before you intend to serve this dish, generously butter your mold and fill it with the smooth light pinkish-brown mixture. Place in a pre-heated, 350 degree oven inside a larger dish in which you’ve added 4 or 5 cups of boiling water (this is very important for your mold to turn out perfectly).
Bake until firm—it’s about ready when it begins to shrink from the sides of the mold. But to be on the safe side, test it with a needle; like a cake, it’s done when the needle comes out clean.
Carefully remove from the oven, run a knife around the edge of the mold, then place a serving platter atop the mold and turn it upside down. And voilà! Everyone will swear you’re a first rate chef! Serve with the béarnaise sauce.
Makes 4 to 6 servings.
The Béarnaise Sauce
Basically, Béarnaise sauce is Hollandaise Sauce to which some tarragon has been added. And here you can either follow the recipe below, or cheat a little by using a store-bought mix. If you do cheat, only buy Knorr brand Béarnaise (or Hollandaise if they’re out of Béarnaise; Hollandaise goes perfectly well with this dish).
However, if you want to try your skills in the kitchen, here’s how to make a perfectly acceptable but quick Béarnaise from scratch (there are more complicated ways to make it, but who wants to spend all their time in the kitchen?).
1/4 teaspoon salt
A pinch of ground pepper
1 & 1/2 teaspoons dried tarragon
1 to 2 tablespoons lemon juice
1 stick sweet butter, cut into small pieces
Place the egg yolks, salt, pepper, tarragon, and 1 tablespoon of the lemon juice in a blender (save the second tablespoon of lemon juice in case you’ll need it).
Heat the butter in a small saucepan until it foams.
Blend the egg yolk mixture for 2 or 3 seconds at high speed. Then, keeping the blender uncovered (you may wish to have a towel ready to protect yourself from splatters), continue blending at high speed as you dribble a very thin stream of the hot butter into the mixture. You should have a thick mixture by the time you’ve used up 2/3 of the butter. (Don’t add the whitish residue at the bottom of the butter pan).
Taste and adjust the seasonings accordingly.
If you don’t use the sauce immediately, pour this portion into a bowl and set it in tepid—but not warm—water. Likewise, if you want more sauce, repeat the above step a second time (but don’t just double the ingredients the first time around, as you’re bound to run into trouble).
Yield: approximately 3/4 cup
Chicken Pot Pie à la Provençal
Okay, let’s face it: Chicken Pot Pie is undeniably an American dish. However, this version is so fragrant that even the crust reminds me of Provence. And yes, it’s quite labor intensive...but when you get your first whiff of it...and your first taste...you’ll have a good idea of what Provence smells like, even if you’ve never been there.
1 tablespoon baking powder
1 teaspoon salt
2 teaspoons dried thyme, crushed
1/2 teaspoon dried rosemary leaves, crushed
2 tablespoons fresh parsley, minced (the flat-leafed Italian variety)*
1 tablespoon grated lemon rind*
2 tablespoons unsalted butter
2 tablespoons nonfat plain yogurt
3/4 cup low-fat milk
1 tablespoon plus one teaspoon extra virgin olive oil
1 large peeled and finely chopped yellow onion*
3 cloves peeled and minced garlic*
1/2 cup dry white vermouth
1 & 1/4 cups canned chicken broth
2 & 1/2 lbs. boneless chicken breast, cut into 1/2-inch pieces
4 medium carrots, cut into 1/2-inch thick slices*
1/2 lb. cleaned and quartered button mushrooms*
4 medium peeled parsnips, cut into 1/2-inch thick slices*
3 tablespoons cornstarch
3 tablespoons cold water
*(Note: All the vegetables can be washed and sliced a day in advance; just put in air-tight containers or zip-loc bags and refrigerate. The same goes for the chicken: simply cut sauté in a little extra virgin olive oil, drain, cool, and refrigerate.)
In a large mixing bowl combine the flour, baking powder, salt, 1 & 1/2 teaspoons thyme (reserving 1/2 teaspoon for later), 1 & 1/2 teaspoons parsley (reserving 1/2 teaspoon for later), and 1 teaspoon of the lemon rind (again, reserving the rest for later). Add the butter and yogurt and mix until it resembles coarse meal. Add the milk and stir until loose and sticky. Cover and refrigerate.
Heat the tablespoon of olive oil (reserving the rest for later) in a large skillet, lightly sauté the chicken breasts, then remove with a slotted spoon. Discard the oil.
Heat the remaining teaspoon of olive oil in a large, cast-iron (or Calphalon-style) oven-proof skillet. Cook the onions, stirring occasionally, over medium heat until translucent but not brown (about 5 minutes). Stir in the garlic and watch carefully that it does not brown or burn (about 1 or 2 minutes). Add the vermouth, cover, and simmer for 5 minutes.
Add the broth, any remaining herbs, and the rest of the grated lemon rind. Stir in the chicken, carrots, mushrooms and parsnips. Cover and simmer for 30 minutes.
In a large cup, mix the cornstarch with the cold water. Stir 1/4 cup of the broth into this mixture, and then quickly stir the contents of the cup into the skillet. Stir well so that the broth is smooth and not lumpy. Simmer for two more minutes, then remove from heat and set aside until skillet is cool.
Preheat oven to 400 degrees.
On a floured surface, roll out the refrigerated dough with a dough roller until it fits the diameter of the skillet top. Cover the skillet with the dough, pinching the sides well. With the tines of a fork, poke some holes in the dough.
Bake until the dough is lightly browned, about 15 minutes.
Yield: 4 servings.
(Note: This supposedly serves 6, but I’ve made this for 5 people, and all of us cleared our plates completely and wished we’d had a few more bites.)
Best Mashed Potatoes Ever
Who doesn’t like mashed potatoes, unless of course you’re on a low-carbohydrate diet like Atkins? Every once in a while even yours truly cuts out potatoes and other starchy foods, but when company comes, I go all out. (Besides, it’s rude to assume just because you’re on a low-carb diet, everybody else is too.) But when you decide to sin—well, jump in and splurge—but make it worthwhile, like with this fabulous (and fabulously easy) dish.
1 small butternut squash (about 2 lbs), peeled, seeded, and cut into small cubes
1/2 cup heavy cream
1 stick unsalted butter, cut into 8 pieces and softened
2 teaspoons kosher salt
Place the potatoes in a medium-size saucepan and cover with an inch of water.
Place the squash cubes in another saucepan and cover with an inch of water.Bring both the potatoes and the squash to a boil, lower the heat, and simmer until they are soft (about 15 minutes for the potatoes and 10 minutes for the squash). Test with a fork for softness.
Warm the heavy cream and the salt in a small saucepan.
Drain the potatoes and the butternut squash together in a colander and return to a larger, clean saucepan. Over very low heat, coarsely mash the vegetables with an old-fashioned, hand-held potato masher, and gradually add the warm cream and butter. (Do not over-mash or use an electric mixer; this is one dish which is best served somewhat lumpy.)
Stir in the salt and serve piping hot. Bon Appétit!
Yield—8 servings, depending upon appetites.
Bake-Fried Potatoes
I’ve found that for certain recipes, the best potatoes are also among the cheapest. For this recipe, use those you buy in 5-pound bags. No need to get fancy-schmanzy. Also, once these are in the oven, you only need to turn them once or twice. This leaves you with around half an hour during which to complete whichever entrée the potatoes are to accompany.
2 garlic cloves
2 & 1/2 lbs. potatoes
1/2 teaspoon salt
Peel, wash, dry, and slice the potatoes thinly and evenly. Make certain they are dry.
Reserving 1 tablespoon of the butter or margarine, melt the rest in a saucepan. Put the garlic through a garlic press and, stirring constantly, sauté it in the butter or margarine until it turns pale gold but not brown.
Use the remaining tablespoon of butter or margarine to grease a large baking tin (the kind with raised edges). Spread the potatoes out on the tin in overlapping rows and brush them with the melted butter and garlic mixture. Sprinkle evenly with the salt.
Bake the potatoes in a preheated 450-degree oven for about 30 minutes (or until golden brown). You will want to turn them once or twice.
This portion serves 4, but they’re so delicious you might want to double the ingredients!
Sweet Potatoes with Bourbon Glaze
Here’s the perfect and most delectable (talk about divine!) accompaniment to roast turkey or roast chicken. And do take my advice: roast turkey isn’t just for Thanksgiving or Christmas. In the Gould household it’s a regular specialty, thanks to the leftovers (which I personally call “pre cooking”). I mean, who has the time to spend hours a day in the kitchen? Not yours truly. Besides, the number of dishes you can make from cooked turkey—everything from Club Sandwiches to Turkey à la King means you’ve cooked for days in advance. I’m also a great believer in freezing cooked turkey (and cooked gravy). I mean, why not prepare your own “TV Dinners” ahead of time? I do.
Anyway, to the best sweet potatoes ever! And mean ever!
3 tablespoons melted butter
Salt and black pepper (preferably fresh ground) to taste
1 & 1/2 tablespoon light brown sugar
1/4 cup bourbon
With a stiff, bristly brush, scrub the sweet potatoes. Cover with water in a pot and bring to a boil. Cook until barely tender (15 to 20 minutes), but do not overcook. Drain and rinse under very cold water and set aside. (The cold water will keep them from cooking any further).
Once the potatoes are cool, peel them, and slice them into 1/4-inch thick “rounds.”
Grease a shallow baking dish with 1 tablespoon of the butter.
Place the potato slices in a rectangular dish, overlapping them. Drizzle evenly with the remainder of the butter. Sprinkle evenly with salt and pepper and the light brown sugar.
(Note: This dish can be prepared ahead of time to this point. Cover it, and you can either set it aside at room temperature for several hours, or else refrigerate it overnight.)
About 3/4 of an hour before you are ready to eat, bake the potatoes in a preheated 425-degree oven for 20 minutes. Then lower the temperature to 350 degrees for another twenty minutes. By now, the potatoes should have a nice glaze.
Right before serving, warm the bourbon over low heat in a small saucepan. Wearing oven mitts, and standing back from the pan, ignite the bourbon. Pour it, still flaming, over the potatoes.
Serve immediately.
Yield: 6 servings.
Orange Liqueur Mousse
Here’s a heavenly dessert mousse which is easy to make and presents a beautiful, successful climax to any meal. Flavored with orange liqueur, it’s guaranteed to sing on the taste buds long after the dinner is over.
(Note: This recipe can be prepared up to 24 hours ahead of time. Also, do not add the garnish until after the mousse is set, lest the garnish sinks. And whatever you do, don’t try to halve this recipe; the measurements make it nearly impossible.)
6 large egg yolks (reserve the whites in a separate bowl; you’ll be using them)
4 teaspoons fresh, finely grated orange rind (just the orange outside; avoid the white pith)
1 cup fresh strained orange juice, minus 4 tablespoons
1 tablespoon strained fresh lemon juice
3 tablespoons orange liqueur (Cointreau, Grand Marnier, or Triple Sec)
1 & 1/2 cups granulated sugar
1 & 1/4 cups plain low-fat yogurt
7 large egg whites
1/4 teaspoon salt
1/4 teaspoon cream of tartar
Optional: 1 orange (for garnishing; or you can substitute 4 to 6 pieces of candied orange peel instead)
Measure 1/4 cup cold water in a heavy saucepan. Sprinkle the gelatin over it and let it soften for 10 minutes.
Set a large metal bowl into an even larger bowl of ice and cold water. Continue on to the next step.
Whisk the egg yolks slightly, then add them to the softened gelatin. Then add them, the orange rind, orange juice, orange liqueur and 1 cup of the sugar (reserving the remaining 1/2 cup until later). Stirring constantly, cook the mixture over medium heat until it thickens slightly and coats the spoon, but do not let it come to a boil. Off heat, beat the mixture with a whisk to stop it from cooking further.
Transfer the mixture to the cold metal bowl (the one set in ice) and, stirring for several minutes, let it cool until it is lukewarm. Whisk in the yogurt.
Discard the large bowl with the ice. Cover the bowl with the mixture in the refrigerator and chill it for half and hour, until it is cold and slightly thickened, but not set.
In another large, deep metal (or glass) bowl, beat the egg whites, salt, cream of tartar, and remaining 1/2 cup of sugar until they hold stiff peaks.
With a rubber spatula, fold a quarter of the egg whites into the refrigerated mixture. Then gently fold in the remaining whites.
Spoon the completed mousse into 1-cup capacity stemmed dessert glasses or bowls and chill, covered loosely, for at least 2 hours, but for no longer than 24.
(Note: This is optional. Before serving, slice the orange thinly, then cut the slices in half, slit the flesh through the center, but keep the skin intact. Using two slices per dessert, fit them cross-wise atop the mousse. Or use candied orange peel. Either of these make a wonderful garnish.)
This fabulous dessert serves 6 to 8 persons.
Lemon-Lime Mousse
Yours truly believes this is one of the near ultimates in desserts. Just make sure you have an electric lemon/lime juicer to make your work easier.
Want to knock your family’s or guests’ socks off? Try this:
1/4 cup cold water
2 teaspoons freshly grated lemon rind
2 teaspoons freshly grated lime rind
1/2 cup fresh lemon juice
1/2 cup fresh lime juice
6 large egg yolks, lightly beaten (reserve the whites for later)
1 & 1/2 cups sugar
1 & 1/4 cups plain yogurt
7 large egg whites
1/4 teaspoon salt
1/4 teaspoon cream of tartar
Optional: thin, halved lemon and lime slices for garnish if desired (see the Orange Liquor Mousse directions, but use one halved lemon and one halved lime slice for each portion)
In a heavy saucepan sprinkle the gelatin over 1/4 cold water and let it soften for 10 minutes. Stir in the grated lemon and lime rinds, the lemon and lime juice, the egg yolks and 1 & 1/4 cup sugar (reserving 1/4 cup for later). Cook the mixture over moderately low heat, stirring constantly, until it has thickened slightly.
Transfer to a large metal bowl which is set in an even larger bowl of cold water and ice cubes. Stir occasionally. After the mixture has cooled to lukewarm, whisk in the yogurt.
Cover and chill the mixture for 30 minutes (or until it is cold and slightly thickened, but not set).
In another bowl, beat the egg whites, the salt, and the cream of tartar until they form stiff peaks.
Stir one fourth of the mixture of egg whites into the lemon-lime mixture, and gently fold in the remaining whites. Spoon the completed mousse into dessert dishes (preferably stemmed clear glass ones), and chill, covered loosely with plastic wrap, for anywhere from 2 to 24 hours.
Garnish as suggested above.
Yield: Serves 8.
English Trifle—The Queen of Pudding Desserts
English Trifle dates back at least to Elizabethan times (1598). Strangely enough, trifle fell out of favor during Tudor times. And then, suddenly in 1763, it popped up again. There must be dozens of varieties in which this dessert can be made, but all of them consist of five basic ingredients: sponge cake, sherry-soaked (plus perhaps brandy-soaked) macaroons, custard, fruits and jams, and syllabub or whipped cream. For simplicity’s sake, I use whipped cream. Keep in mind that this is one dessert which you can experiment with using various liquors, fruit, and jams, and is a testimonial to the British taste for “nursery food”—no matter your age.
(Note: This recipe is best made a day in advance, so that all the flavors can meld together; also, it is most impressive when served in a large, round, straight-sided, clear glass trifle bowl on a plinth.)
The Spongecake
(Note: If you are pressed for time, you may avoid this step and use a store-bought spongecake, although it is not as good as one made from scratch.)
2/3 cup granulated sugar (plus an extra 2 tablespoons reserved for later)
4 egg yolks
2 teaspoons vanilla extract
4 egg whites
A pinch of salt
3/4 cup sifted cake flour (plus a tablespoon or so extra for flouring the cake pan)
Liberally butter and flour the cake pan. Melt the 4 tablespoons butter and set aside to cool.
Using a separate bowl and an electric beater, gradually mix the sugar into the egg yolks, add the vanilla, and beat for several minutes until the mixture is a thick, pale yellow.In yet another separate bowl, beat the egg whites and salt until it forms soft peaks. Sprinkle with the 2 tablespoons of sugar and beat until the peaks are stiff.
Transfer 1/4 of the egg whites into the bowl with the melted butter and egg yolks. Add 1/4 of the cake flour and blend the mixture with a rubber spatula. Repeat this slowly 3 more times, until the egg whites and flour are depleted. Add half the cooled but melted butter. Blend, then add the rest of the melted butter (but throw out any milky residue on the pan’s bottom). Do not overmix; you want the egg whites to retain as much volume as possible.
Transfer the batter to a 10-inch square cake pan. Tilt the pan so that the batter has a chance to cover it to the rim all around. Place in a preheated, 350-degree oven for 30 to 35 minutes. The cake is done when it is light brown, puffed, and shrinks from the sides of the pan.
Remove from the oven and place on a cooling rack for about 10 minutes. (It will shrink some more and sink slightly.) Then run a knife around the edges of the pan, give it a gentle shake, and reverse it onto a plate. Let it stand for at least an hour or so; you want it cool before continuing to the next step.
The Custard
5 egg yolks
1/2 cup flour
2 cups boiling milk
2 teaspoons pure vanilla extract
2 tablespoons cognac or brandy
Heat the milk until it boils. Meanwhile, place the egg yolks in a large bowl and gradually beat in the sugar with an electric beater for a couple of minutes. When you have a pale yellow mixture, beat in the flour. Then, using a wire whisk, slowly add the boiling milk in a thin stream, whisking all the while. When you are done, pour the mixture into a medium size (preferably heavy enamel) saucepan.
Place the saucepan over medium heat and, whisking all the while, bring the sauce to a boil. Turn down the heat and simmer for several minutes, still whisking and making sure the bottom of the saucepan doesn’t get scorched.
Remove from heat and whisk in the vanilla extract and the brandy. Let it cool, but place a dot of butter atop it so a skin doesn’t form. You can also cover the cooled custard with waxed paper, and refrigerate it for a day until you’re ready to use it.
Assembling the Trifle
10—12 store-bought ladyfingers (optional)
Raspberry and/or strawberry and apricot jam
4-5 tablespoons sweet sherry
4-5 tablespoons brandy, cognac, or amaretto liquor
1 tablespoon grated lemon zest (finely grated rinds, just the yellow, not the pith)
2 bananas cut into thin slices
1 pint strawberry halves (reserving a few for garnishing)
A small handful of toasted almonds (optional* see recipe below)
1 sliced kiwi fruit (optional, and reserving a few slices for garnishing)
1/2 pint (or more, depending on taste) wh ipped cream
You shall need a very large bowl (preferably a glass-sided trifle bowl). Cut the spongecake into small thin slices, and spread with the jams. Line the bottom of the trifle dish and the sides with these little spongecake “sandwiches,” alternating them with ladyfingers if you like. Sprinkle with a couple of fingers of lemon zest. Drizzle with the sweet sherry, and add some of the optional toasted almonds.
Spoon a third of the custard on the bottom and sides of the “sandwiches.” Add some of the banana slices and strawberry halves, and half the optional kiwi fruit. Sprinkle with some more of the lemon zest and optional almonds. Add a little more of the custard. Then layer with the macaroons or amaretto biscuits in a pleasing pattern. Drench with your choice of brandy, cognac, or amaretto liquor. Cover completely with the rest of the custard. Sprinkle with more lemon zest. Top completely with the whipped cream and garnish with the reserved fruit. Chill well in advance of serving, preferably overnight.
(Note: You can add more or less liquor, depending upon taste. But the idea is to soak the cakes well with it.)
Toasted (Optional) Almonds
Giving it a shake every now and then, heat the almonds in a heavy saucepan atop the stove. You want them slightly toasted but not burned. A golden color is what is hoped for. Remove from heat. Simplement, as they say in France, non?
And there you have it: the greatest pudding of all time. And remember, you can play with this recipe by using peaches and syrup or the like instead of the suggested fruits. And yes, this is a verrrry rich dessert...but isn’t that what desserts are for?
Serves a whole bunch, hopefully with leftovers.